Sunday, March 9, 2014

Rebuilding The steering Column

I changed the color of the interior in my 76 pinto to black, so I of course disassembled the steering column . I took pictures and notes and even looked at the shop manual for the car.
That was last year. Now I need to put it back together. In the mean time I did grease oil and paint all the visible parts.

I remembered to slide the lower part on first, as once you bolt up the collar where the ignition cylinder is, it wont fit back on. The collar has 2 bolts with flat tops that notch into the column itself. You will need to insert the one on the ignition lock release side before you slide it on, then the one on the ignition key once you have the collar on. Dont forget the rod that goes down the column to the switch this rod activates the switch when you tuun the key and cant be put on after the collar.

Then get help

Once you have successfully petted the dog and resisted the urge to go and sleep in the sun with him. Get column shaft through the collar and pull it as far as you can.


Now you will put the yellow clip on the column shaft just above the large threads. then the freshly greased bearing with the plastic sleeve over it. Ball bearing side down.

Then the blue snap ring goes on

Now push the shaft in until the bearing sets into the collar. the plastic sleeve will be flush.
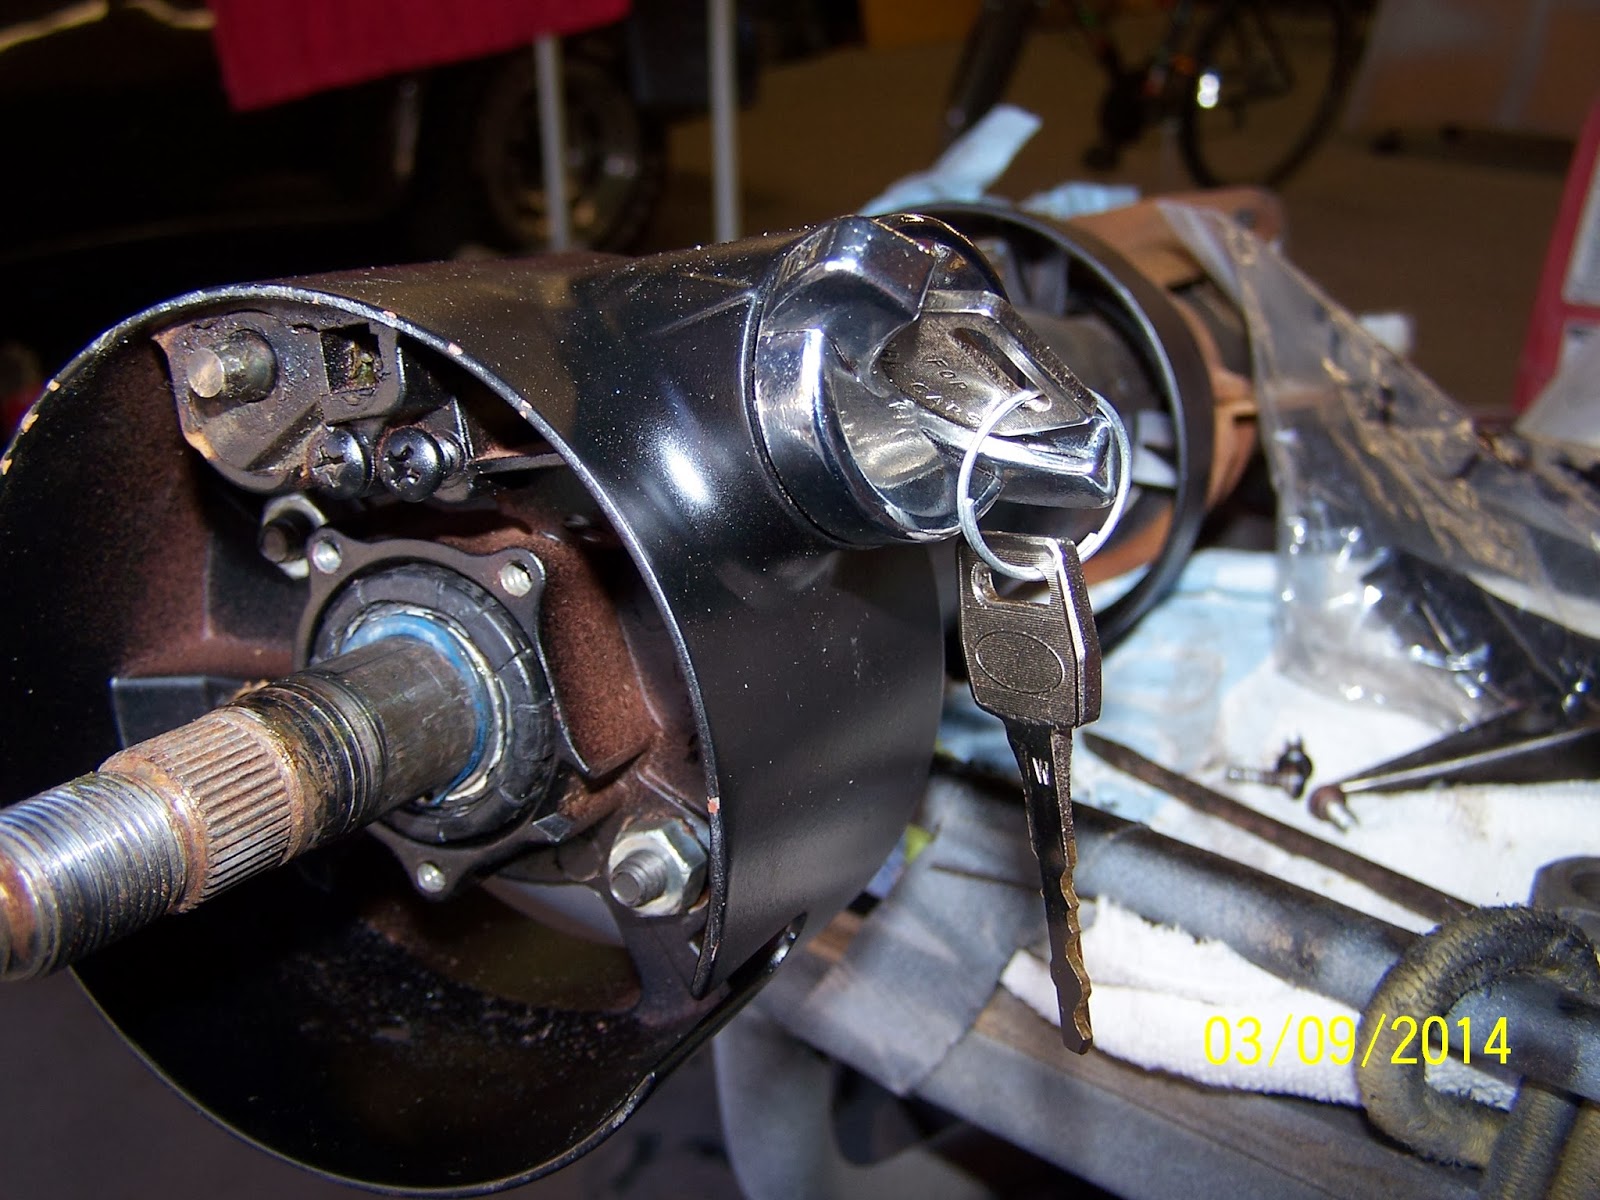
To install the ignition cylinder ( this is a new one) I pulled the lock rod up to the locked position  and turned the key in the cylinder until I was able to press the locking pin in. ( new ones are ready to go.) A little jiggle and slide and its in. The locking pin pops into the hole when you turn the key. Check that the key will go to all positions and come out when the cylinder is locked.


Next is the blinker and horn assembly and the wire to the cylinder. Start all the screws and then start to screw in the blinker arm  then tighten the screws. I set the ignition switch to off and placed it on the rod hook and bolted it down. I tested the connections and done.
Then put the steering wheel on just to see how nice it looks. Now I just need to finish the car.


 I took a picture of the page in the shop manual to show the entire thing.

Feel free to leave comments on your experience doing the same job. 

Tuesday, November 13, 2012

Rebuilding the gas sender on a 1976 Pinto


I took the sender out of this homemade gas tank, it held gas but I was scared of it.  I bought a new tank. The sender was stock and it looked like someone had left old gas in the tank long enough to turn to sludge.
 The sender comes apart with some small bendy tabs I opened them slowly and was able to separate the two halves. There was so much sludge inside I had to scrape it out and then went at it will some gas and a brush.
 I got it clean enough here to inspect the wrapped wire resistor and the tab
 I just cleaned the other side the same way and disconnected the wire from the back.
 I used some 600 grit sand paper on the copper tab and bent the bar a bit. I checked it a few times to see that it moved smoothly.


 Re soldered the wires after I finished cleaning with solvent and then with the parts cleaner and gunk.
The finished product I tested it with  the gauge and a car battery and it works fine. I will soak it is gas and give it a final scrub with steel wool before it goes back in the tank. It took me about 4 hours but I was stopping and starting , had some coffee breaks and some wander gazing so it could be done faster.
Let me know you comments .

All striped down to the shell and ready to sand

I really hope I do not need to remove any more parts. I have 2 SD cards full of pictures and 100s of baggies of nuts and bolts.

Tuesday, October 9, 2012

Refurbish Instrument cluster on 1976 Ford Pinto

The Instrument cluster was in poor shape but all the gauges worked. The white plastic in the back of it fell apart when I removed it, This is very common. I found one that had the plastic but the gauges did not work form a member at www.fordpinto.com. Over all it cost me abut 20 dollars in stuff and I paid 45 for the parts cluster.
Here is the pinto dash before I removed it and found that the white plastic had disintegrated.

Sanded the insides 

Sprayed the whole thing with adhesion promoter

Good Stuff

Looks nice in primer 


Black rustoleum spray paint

I did lots of taping and sprayed from the back with this silver paint

I learned later that I needed to do another coat of silver as I missed a few edges

Looks good from here

You can see the spots where I should have paid more attention but I did repair them

Sunday, September 23, 2012

The pinto dashboard and steering wheel


This is the pinto dashboard and steering wheel before I began work on it. It is in excellent shape considering the car is about 36 years old. As you can see in the previous posts the car was relatively rust free. The carpet came out is pieces as it had gotten wet many times from a leaky windshield and and drivers side air vent.

Friday, September 21, 2012

1976 Ford Pinto The day it arrived


1976 pinto open trunk with extra parts

passenger side interior picture for pinto 1976

ford pinto back seat picture

rear deck

1976 Ford pinto 2.3  engine stock


ford pinto steering wheel


Ford Pinto Rotisserie

This is my 1976 for pinto up on its side. As you can see I have begun to paint as I clean. When complete I will use bed liner to finish the underside of the car.