Showing posts with label 76 pinto. Show all posts

Sunday, July 9, 2023

76 Ford Pinto Floor Repair. Fiberglass POR-15 Welding and Rust Treatment - Repair

 I got this Pinto in Mid June 2011. I had it running and yard driving in just a week or so. The first thing I did was gut the inside. I removed everything I could without making it undrivable. I had just a small amount of floor rust to repair. I put the driver's seat in so I could move the car.


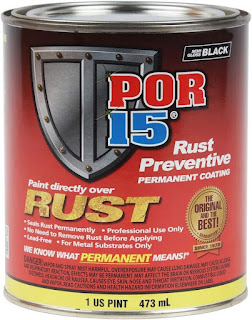
The rear passenger side under the back seat had some small holes just about 1/4 inch. At that time I had just learned about POR-15. I got a couple cans.


can of por-15

As you can see the passenger floor was in perfect shape. I scrubbed it clean and removed any surface rust.

The entire floor ended up coated in POR-15 after I used Rust mort


Some of the floor looked perfect.
This looked a lot worse than it really was. I wire-brushed most of this rust off and treated it. No holes.
Those 1/4-inch holes got a bit bigger. I had to get creative on this repair.
This is behind the driver's seat, right-hand rear hole. I was going to just weld in a bit of sheet metal but there seemed to be flexing some so I added some angle iron for support.


Monday, June 23, 2014

Cleaning the heads and lapping the valves on a 2.8 V6 ford pinto

I took the engine apart some time ago and I am now getting to the clean and rebuild stage. The valves were shot.
Crack in the valve this was the worst one
I I loaded up my cart and got to it . Purple power from the dollar store did a surprisingly good job Ill spare you the details of scrubbing and spraying and having grease water and soap sprayed up my nose.

Then back to the work bench and I spent some time with the dremel and several brass wire wheels.

Now I need to lap the new valves its a simple process. get the tool the tool the compound and the valves and get to it. I watched so many videos of people who all claimed either they were experts or just guessing. Here is the way I do it. i cant say its the best way but it works.
1. clean everything with prep all or any wax, grease oil remover.
2.I use my gun cleaning rod and swab to do the valve guides
3. I put some compound on the valve on the lip then oil the guide and the stem.
4, Put the valve in and attach the tool.
5. I spin it until the noise changes and it gets quiet.
6. lift turn 1/4 turn and spin again until the noise stops. I repeat this 3 times on each valve.
Then clean and repeat on the next one. I test the work by dropping in both vales in the valve bowl  then filling it with fuel or alcohol. If they hold liquid with just the weight of the valve its done. Don't forget to put a spark plug in. As I said this is how I do it. I don't build engines for a living and my rebuilds have always been stock or just a small amount of  modification.

That is all there is too it keep the compound on the lip don't get it in the guide, I did a final clean with break-free and the gun cleaning rod , then coated it all with wd40 until i assemble it.

Please feel free to comment.

Tuesday, November 13, 2012

Rebuilding the gas sender on a 1976 Pinto


I took the sender out of this homemade gas tank, it held gas but I was scared of it.  I bought a new tank. The sender was stock and it looked like someone had left old gas in the tank long enough to turn to sludge.
 The sender comes apart with some small bendy tabs I opened them slowly and was able to separate the two halves. There was so much sludge inside I had to scrape it out and then went at it will some gas and a brush.
 I got it clean enough here to inspect the wrapped wire resistor and the tab
 I just cleaned the other side the same way and disconnected the wire from the back.
 I used some 600 grit sand paper on the copper tab and bent the bar a bit. I checked it a few times to see that it moved smoothly.


 Re soldered the wires after I finished cleaning with solvent and then with the parts cleaner and gunk.
The finished product I tested it with  the gauge and a car battery and it works fine. I will soak it is gas and give it a final scrub with steel wool before it goes back in the tank. It took me about 4 hours but I was stopping and starting , had some coffee breaks and some wander gazing so it could be done faster.
Let me know you comments .

All striped down to the shell and ready to sand

I really hope I do not need to remove any more parts. I have 2 SD cards full of pictures and 100s of baggies of nuts and bolts.