This is about my 1976 Ford Pinto I am slowly rebuilding it. I completed this car about 5 years ago and I am still driving it. I recently found all the pictures I thought I had lost. Pintos have some special needs like other cars. One of which is the floors are usually rusted out. I got this in very good shape, I think. Please comment and let me know what you think or if you see me make a mistake or have questions.
Sunday, July 16, 2023
Sunday, July 9, 2023
76 Ford Pinto Floor Repair. Fiberglass POR-15 Welding and Rust Treatment - Repair
I got this Pinto in Mid June 2011. I had it running and yard driving in just a week or so. The first thing I did was gut the inside. I removed everything I could without making it undrivable. I had just a small amount of floor rust to repair. I put the driver's seat in so I could move the car.

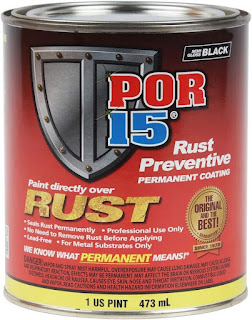
The rear passenger side under the back seat had some small holes just about 1/4 inch. At that time I had just learned about POR-15. I got a couple cans.
As you can see the passenger floor was in perfect shape. I scrubbed it clean and removed any surface rust.
Some of the floor looked perfect.
This looked a lot worse than it really was. I wire-brushed most of this rust off and treated it. No holes.
Those 1/4-inch holes got a bit bigger. I had to get creative on this repair.
This is behind the driver's seat, right-hand rear hole. I was going to just weld in a bit of sheet metal but there seemed to be flexing some so I added some angle iron for support.
Friday, June 30, 2023
Re- building the Ford Pinto V6 2800 cc This was for my 76 Pinto But ended up in my 79.
This rebuild took me a couple months I think. I was building this for my 76 but as it turns out I needed it for my 79 wagons. ( Im working on the wagon now.) I bought this engine from a guy who assured me that it was good.🙈🙉🙊 I took the oil pan off the day I got it home and the oil pickup was full of blue silicone pieces. The lower timing gear ( the big one) had several missing teeth. You can see, in the first picture that the valves were shot as well. BTW I just recently found all these pictures. I lost a couple Memory cards worth.
I tried to show the inside of the water jacket in the front left corner. There were 3 YES Three oild freeze plugs in the water jacket. It took me 2 days to get them out. I had to wedge them in and bend them, then grab them with needle nose pliers
My new set of valves, they were about 40 bucks then and haven't changed in price much since.
The first time through with the hone. I was lucky the cylinders were in good shape. Considering the rest of the engine.
Overall it came out well. It is not a high-horsepower engine. I think it's about 120 HP all in. I wanted the V6 because I am going to tow a small camper with it.
Lucky for me I still had the Corvette to keep the manuals on. it was a good pinto parts holder.
I did a complete valve job and each cylinder held fluid over night .
The crank going in is the last picture I found for the assembly.
Thursday, June 29, 2023
Rust conversion and undercoating on my 76 Pinto
This is still back in 2012. Thw car is complete well mostly complete.
After pressure washing, scrubbing, and treating the underneath of the car, I used Barrier Bond and coated it all.

Getting started with undercoating there is a big "EB" between the uni-body rail and the transmission tunnel I still don't have a clue what it's for.


