Tuesday, November 13, 2012

Rebuilding the gas sender on a 1976 Pinto


I took the sender out of this homemade gas tank, it held gas but I was scared of it.  I bought a new tank. The sender was stock and it looked like someone had left old gas in the tank long enough to turn to sludge.
 The sender comes apart with some small bendy tabs I opened them slowly and was able to separate the two halves. There was so much sludge inside I had to scrape it out and then went at it will some gas and a brush.
 I got it clean enough here to inspect the wrapped wire resistor and the tab
 I just cleaned the other side the same way and disconnected the wire from the back.
 I used some 600 grit sand paper on the copper tab and bent the bar a bit. I checked it a few times to see that it moved smoothly.


 Re soldered the wires after I finished cleaning with solvent and then with the parts cleaner and gunk.
The finished product I tested it with  the gauge and a car battery and it works fine. I will soak it is gas and give it a final scrub with steel wool before it goes back in the tank. It took me about 4 hours but I was stopping and starting , had some coffee breaks and some wander gazing so it could be done faster.
Let me know you comments .

All striped down to the shell and ready to sand

I really hope I do not need to remove any more parts. I have 2 SD cards full of pictures and 100s of baggies of nuts and bolts.

Tuesday, October 9, 2012

Refurbish Instrument cluster on 1976 Ford Pinto

The Instrument cluster was in poor shape but all the gauges worked. The white plastic in the back of it fell apart when I removed it, This is very common. I found one that had the plastic but the gauges did not work form a member at www.fordpinto.com. Over all it cost me abut 20 dollars in stuff and I paid 45 for the parts cluster.
Here is the pinto dash before I removed it and found that the white plastic had disintegrated.

Sanded the insides 

Sprayed the whole thing with adhesion promoter

Good Stuff

Looks nice in primer 


Black rustoleum spray paint

I did lots of taping and sprayed from the back with this silver paint

I learned later that I needed to do another coat of silver as I missed a few edges

Looks good from here

You can see the spots where I should have paid more attention but I did repair them

Sunday, September 23, 2012

The pinto dashboard and steering wheel


This is the pinto dashboard and steering wheel before I began work on it. It is in excellent shape considering the car is about 36 years old. As you can see in the previous posts the car was relatively rust free. The carpet came out is pieces as it had gotten wet many times from a leaky windshield and and drivers side air vent.

Friday, September 21, 2012

1976 Ford Pinto The day it arrived


1976 pinto open trunk with extra parts

passenger side interior picture for pinto 1976

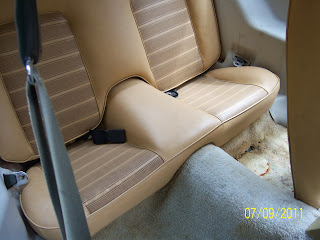
ford pinto back seat picture

rear deck

1976 Ford pinto 2.3  engine stock


ford pinto steering wheel


Ford Pinto Rotisserie

This is my 1976 for pinto up on its side. As you can see I have begun to paint as I clean. When complete I will use bed liner to finish the underside of the car.