Thursday, June 29, 2023

Rust conversion and undercoating on my 76 Pinto

 This is still back in 2012. Thw car is complete well mostly complete.

After pressure washing, scrubbing, and treating the underneath of the car, I used Barrier Bond and coated it all. 

The Barrier Bond converted any rust and I painted the entire underneath with black Rustoleum. Then I used a brush and 2 quarts of undercoating from Rustoleum also. 


Getting started with undercoating there is a big "EB" between the uni-body rail and the transmission tunnel I still don't have a clue what it's for.

I went to town on the undercoating. I made sure that every corner and bracket was done.


Sunday, June 25, 2023

Power Washing the underneath of the Pinto

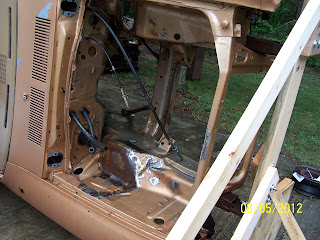
 After I got it up on its side, I removed everything that wasn't already gone. All the lines mounts and brackets that came off did. I then washed it several times with a detergent soak in-between.

As you can see there was very little rust on the floor. Some surface  rust that I was bale to treat and has never come back. I used rust mort it worked great .

You can see one spot here where I had to weld in a patch at the back bolt on the drivers side. I used a small piece of angle iron that I flattened a bit then just burned it in.

I did remove the clutch cable and heater hosers when it came back down I'm not sure why I left them before I put it up.

Now I can start on the protection coats and the repair of the battery tray area.


Thursday, June 22, 2023

I cant believe that is has been 10 years since I did the Pinto

 I found these pictures recently. They are of the fist time the Pinto came out of the garage on my "Redneck Rotisserie" . 

This is the first time it comes out after being stripped of all its parts. I stopped because I was afraid it would roll away from me .

Of course it rained the first day I had to work on it.


Its up! I had four people over to help ... Cost? Beer and pizza. As it turns out it took one person to lift it.


Just stared at it for a few minutes before i started work


Wednesday, April 21, 2021

Black Out the Tail Light Trim on my 76 Ford Pinto

I set about blacking out the tail light trim. First  I disassembled the taillights, they have 6-8 tabs on the back with a Phillips screw holding them. Once you have the screws out you can separate the trim from the lenses and gaskets. There are some pictures of the finished taillights but I lost the in-progress ones. The last picture is how they look on the car after paint.
The finished item on the car