I changed the color of the interior in my 76 pinto to black, so I of course disassembled the steering column . I took pictures and notes and even looked at the shop manual for the car.
That was last year. Now I need to put it back together. In the mean time I did grease oil and paint all the visible parts.
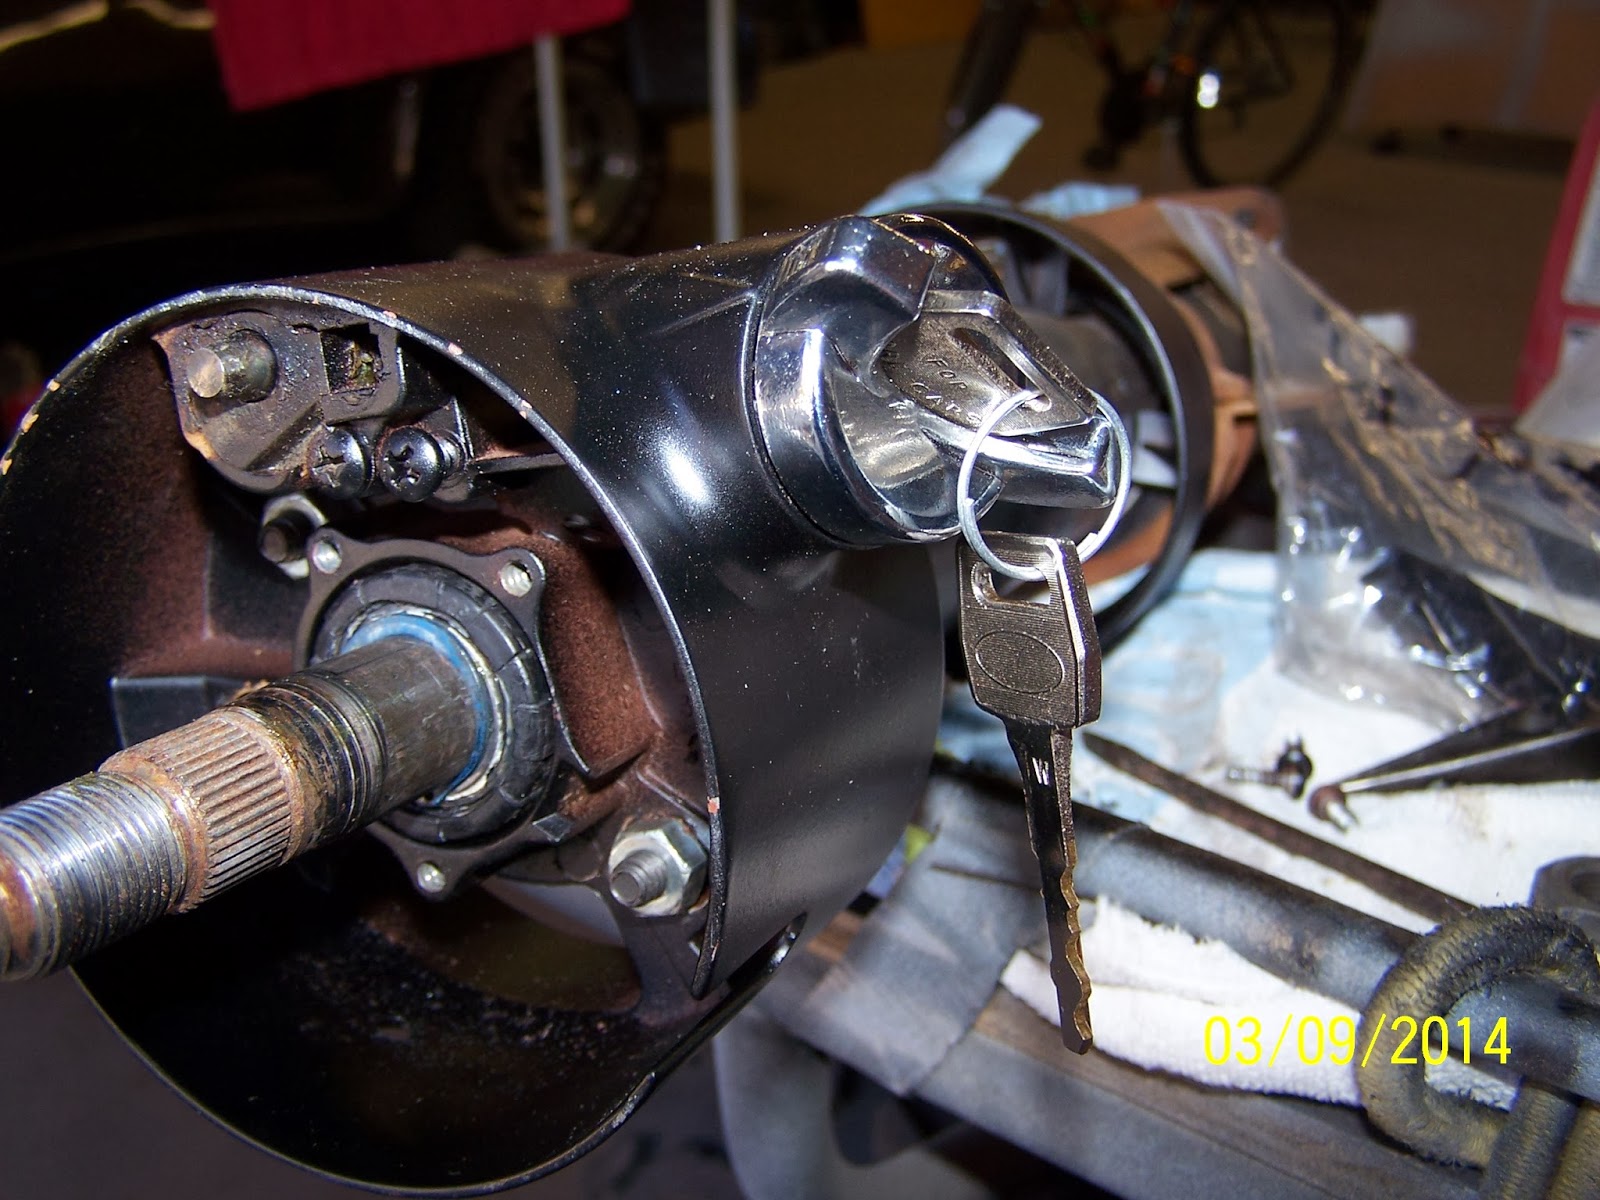
I remembered to slide the lower part on first, as once you bolt up the collar where the ignition cylinder is, it wont fit back on. The collar has 2 bolts with flat tops that notch into the column itself. You will need to insert the one on the ignition lock release side before you slide it on, then the one on the ignition key once you have the collar on. Dont forget the rod that goes down the column to the switch this rod activates the switch when you tuun the key and cant be put on after the collar.
Then get help
Once you have successfully petted the dog and resisted the urge to go and sleep in the sun with him. Get column shaft through the collar and pull it as far as you can.
Now you will put the yellow clip on the column shaft just above the large threads. then the freshly greased bearing with the plastic sleeve over it. Ball bearing side down.
Then the blue snap ring goes on
Now push the shaft in until the bearing sets into the collar. the plastic sleeve will be flush.
To install the ignition cylinder ( this is a new one) I pulled the lock rod up to the locked position and turned the key in the cylinder until I was able to press the locking pin in. ( new ones are ready to go.) A little jiggle and slide and its in. The locking pin pops into the hole when you turn the key. Check that the key will go to all positions and come out when the cylinder is locked.
Next is the blinker and horn assembly and the wire to the cylinder. Start all the screws and then start to screw in the blinker arm then tighten the screws. I set the ignition switch to off and placed it on the rod hook and bolted it down. I tested the connections and done.
Then put the steering wheel on just to see how nice it looks. Now I just need to finish the car.
I took a picture of the page in the shop manual to show the entire thing.
Feel free to leave comments on your experience doing the same job.